Call Cadence
Call cadence refers to the structured and automated sequence and timing of outbound call attempts made to a prospect, customer, or lead. Instead of calling randomly or too aggressively, a call cadence defines how often and when to place calls, for example, spreading them out over a few seconds, minutes, hours, days, alternating times of day, or combining calls with other touchpoints. It’s essentially a rhythm or strategy that ensures outreach is consistent, professional, and effective.
This is the strategic rhythm behind successful outbound calling. It’s not just about making calls. It’s about making the right calls at the right time. A call cadence gives your team a proven, repeatable process for reaching prospects in a thoughtful and consistent way, ensuring no opportunity slips through the cracks.
Benefits of a strong call cadence
- Reach More People, Faster: by spreading calls across optimal times, you dramatically improve live connection rates.
- Boost Engagement & Conversions: a well-structured cadence keeps your brand top-of-mind and builds trust without overwhelming prospects.
- Stay Consistent Across the Team: the Cadence application follows the same winning formula, delivering a professional and reliable customer experience.
- Work Smarter, Not Harder: instead of guessing when to call, the system follows a tested cadence that drives results and maximizes efficiency.
- Turn Data Into Deals: with trackable cadences, you can see what works, optimize outreach, and continually sharpen your edge.
How to use Call Cadence on the Smart Carrier Platform
Call Cadence will only work if you connect your Vicidial server(s) to us. Here’s how to connect Vicidial to the Smart Carrier Platform:
Go to Integrations.
Toggle the Vicidial box to on (you will see the switch turn a green color).
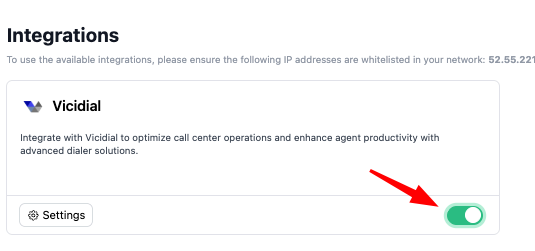
Click the Settings button. You will see your options on the right-hand side.
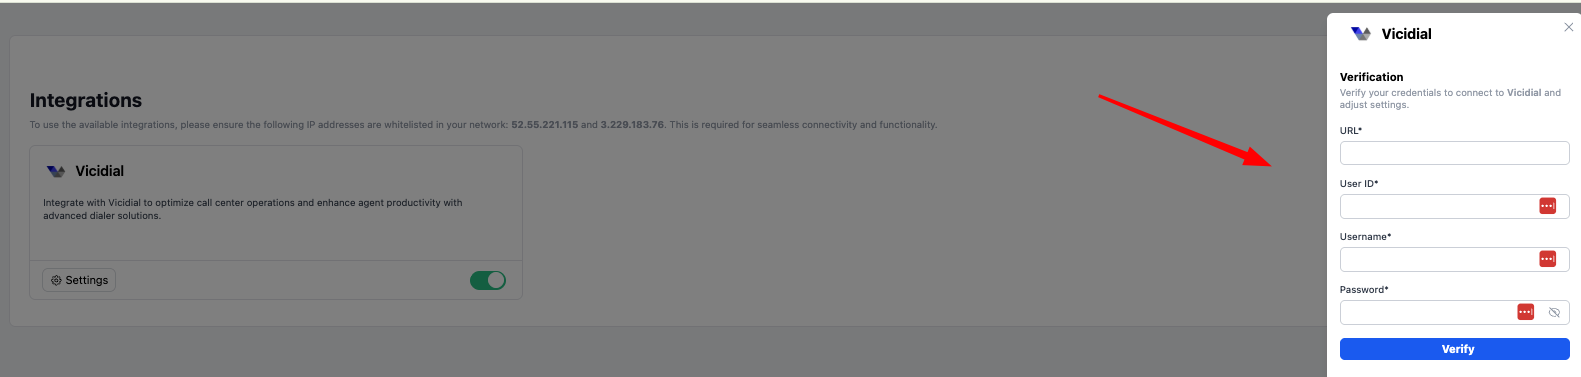
Enter the URL to your Vicidial server, User ID and Username (these are usually the same, but may differ by application), and your password.
Prior to clicking Verify, make sure your Vicidial server will accept requests from our IPs,
52.55.221.115and3.229.183.76.Click Verify. We will attempt to connect to your Vicidial web server with the URL and credentials provided.
Once verified, proceed to step two.
Navigate to Outbound → Call Cadence: portal.smartcarrier.io/tools/call-cadence
You will see a blue box called Quick Access URLs. You will need to expand this box and add the URLs to your Vicidial Campaign Details.
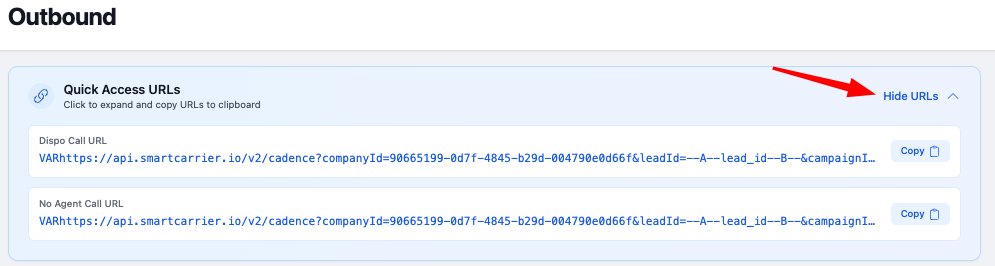
Add the Dispo Call URL and the No Agent Call URL to your Campaign Details page. Type
ALTinto these 2 boxes and then submit at bottom of screen. After submitting, go back and click on the link that says Alternate Dispo URLs Defined.
The URL page will open and enter the STATUSES that you want to trigger the webhook, and enter the webhook below. Be sure ACTIVE is set to
Y.
Now you may configure your Call Cadence Settings. The Call Cadence screen is divided into two sections: the first is Campaign Overview and the second is Call Cadence Templates. Call Cadence Templates is where you define how you want the Cadence to operate. Go ahead and create a new template by clicking the Create button.

A window will open where you may specify the call count and how long to wait before initializing the next calls. You may list as many as 50 Call Attempts per Call Cadence Template. Add the rows needed for your Cadence and click Save Call Cadence.
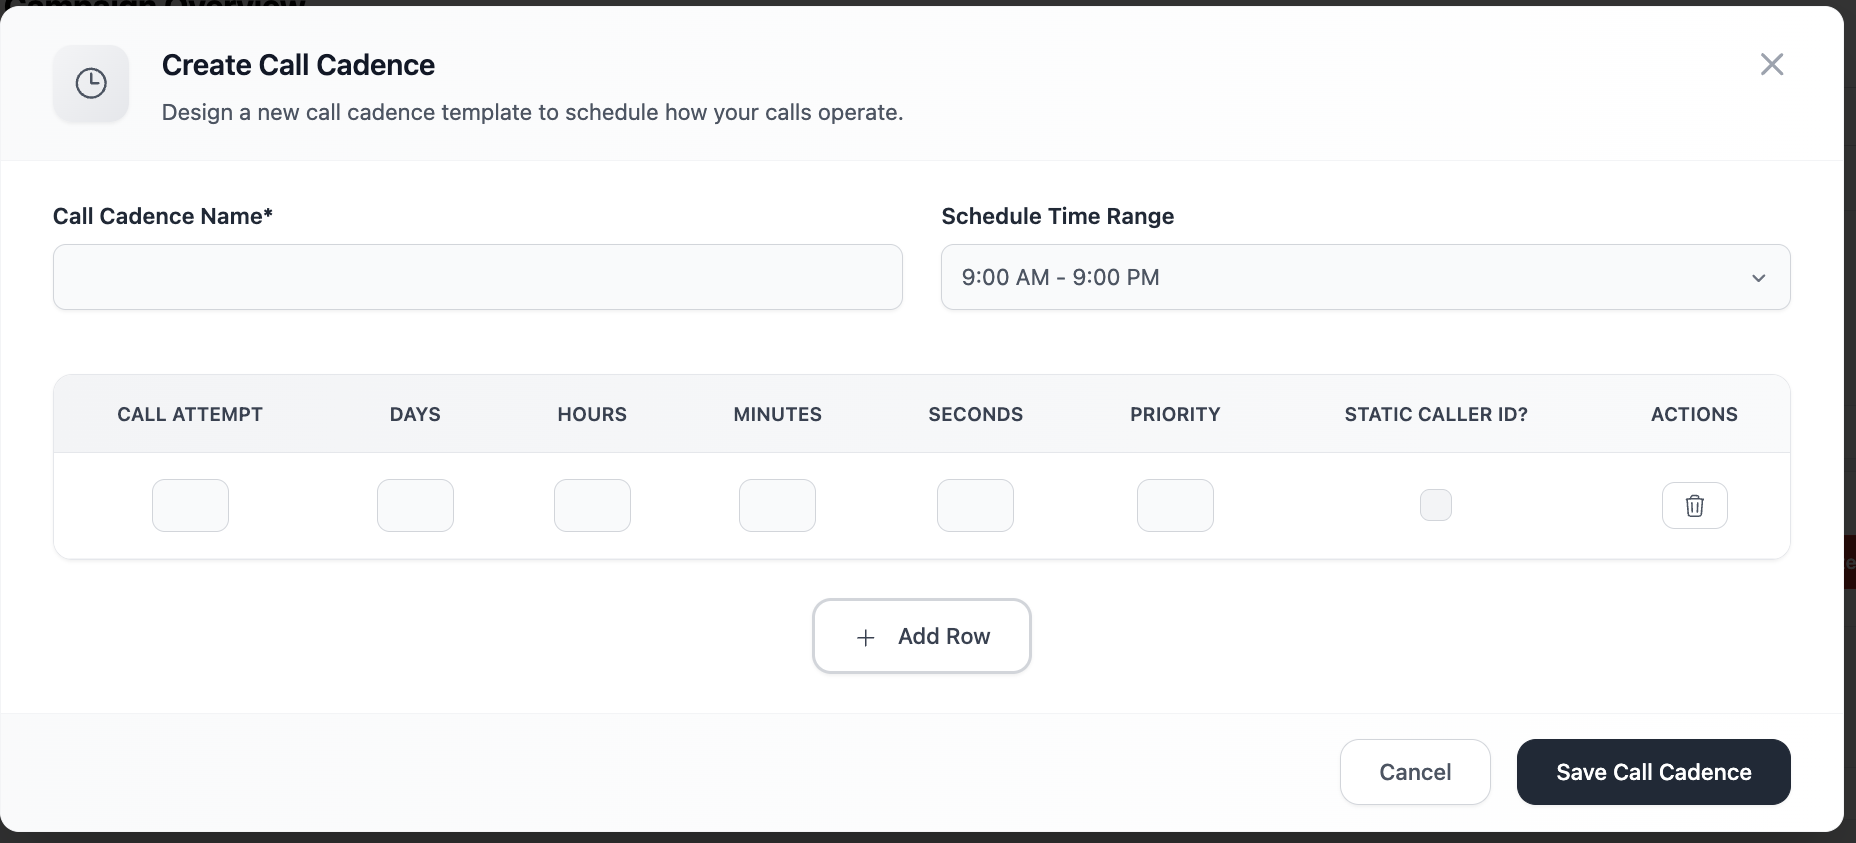
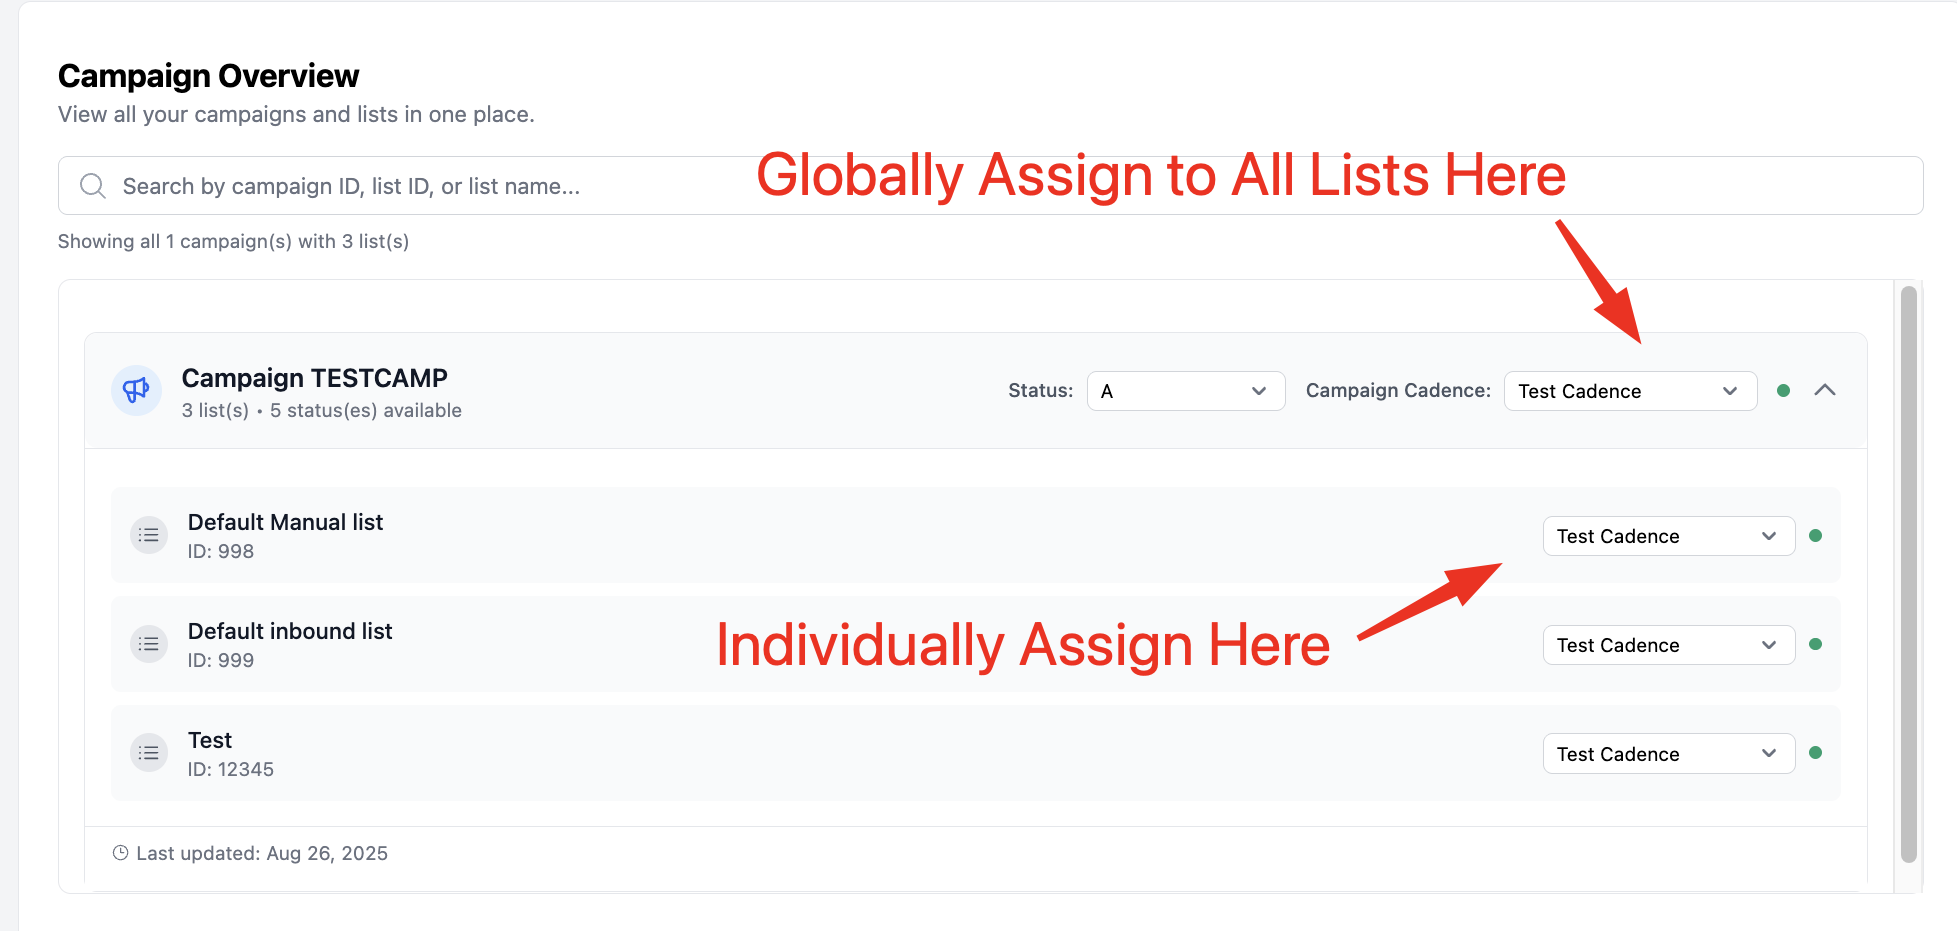
Now that you have a template, you may apply that template to the lists and statuses you would like by expanding the appropriate Call Campaign.
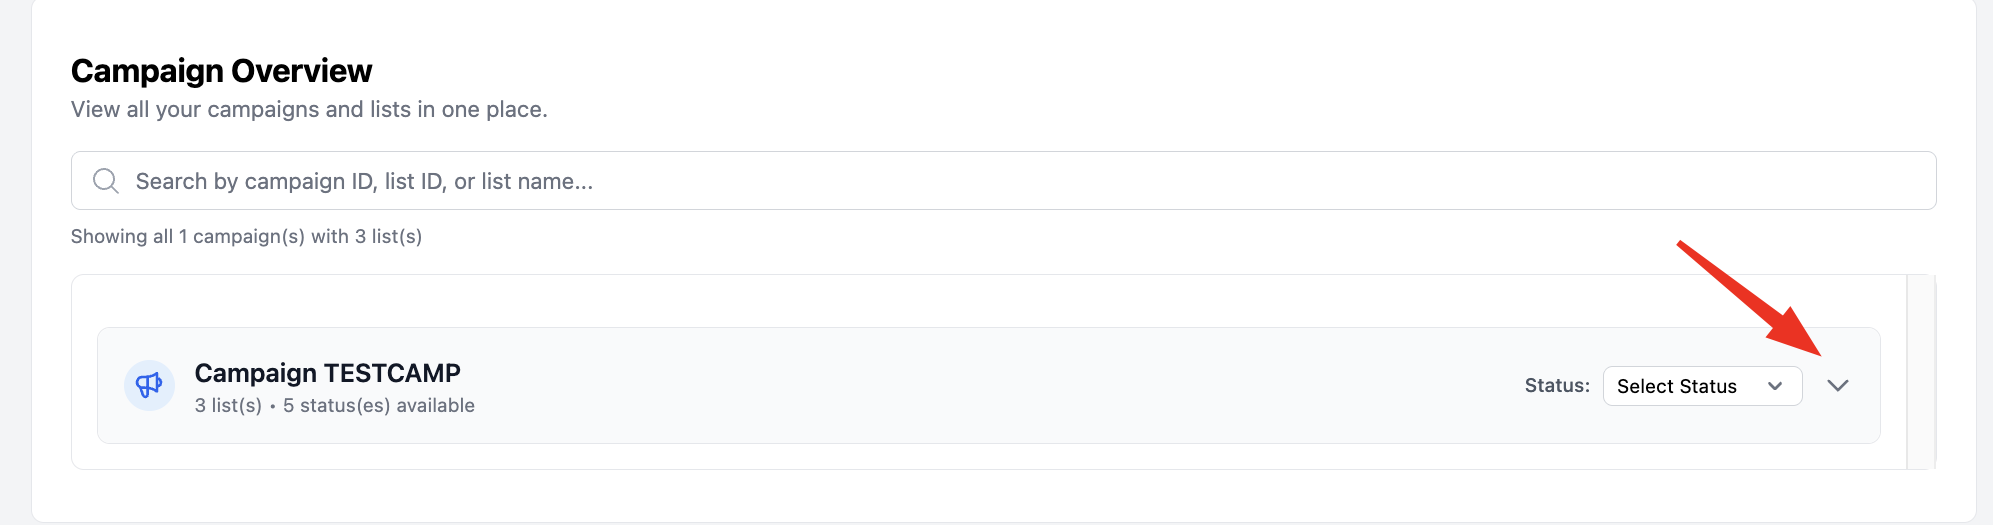
Once expanded, you may assign the template to individual lists or as a whole.
Campaign Overview
The Campaign Overview section lets you inspect active campaigns, associated list counts, and disposition statuses.
- Search: Filter campaigns by Campaign ID, List ID, or List Name.
- Campaign ID: Unique identifier for the dialing campaign (e.g.,
101,SALESTM_A). - Lists & Statuses: Displays the total lists assigned and the available call statuses (e.g.,
NEW,A,AA,DROP,N,NA). - Status Selector: A dropdown filter to view list records matching a specific disposition status.
Call Cadence Templates
The Call Cadence Templates section provides controls to build and manage automated scheduling templates.
- Create Template: Click Create to configure a new call cadence template.
- Template Card: Each saved template displays its title, creation timestamp, and a unique system identifier hash, along with the following operations:
- Preview: View the structured interval rules and retry timing steps configured within the template.
- Edit: Modify existing execution timing, retry rules, or status mappings.
- Delete: Remove the cadence template from the account.
Quick Access
Expand the Quick Access URLs panel at the top of the page to copy direct API or dashboard links to your clipboard for quick sharing and integration.